You may have seen Unfold Your Design Potential - Part 1 where I introduced the Fatten Surface feature and in Part 2, how it worked. In this final post, I take a look and see how we can use this information for manufacture. I also discuss a couple of questions and highlight enhancements to come.
Analyse for Manufacture
 |
| Glasses case |
My CAD model below in the deformation plot below isn’t perfect, but it seems to correlate with reality, showing me where the stressed areas are. Increasing the mesh quality, and some more control points will increase the accuracy of the deformation values, making them more realistic. I could also sped a bit more time modelling for accuracy.
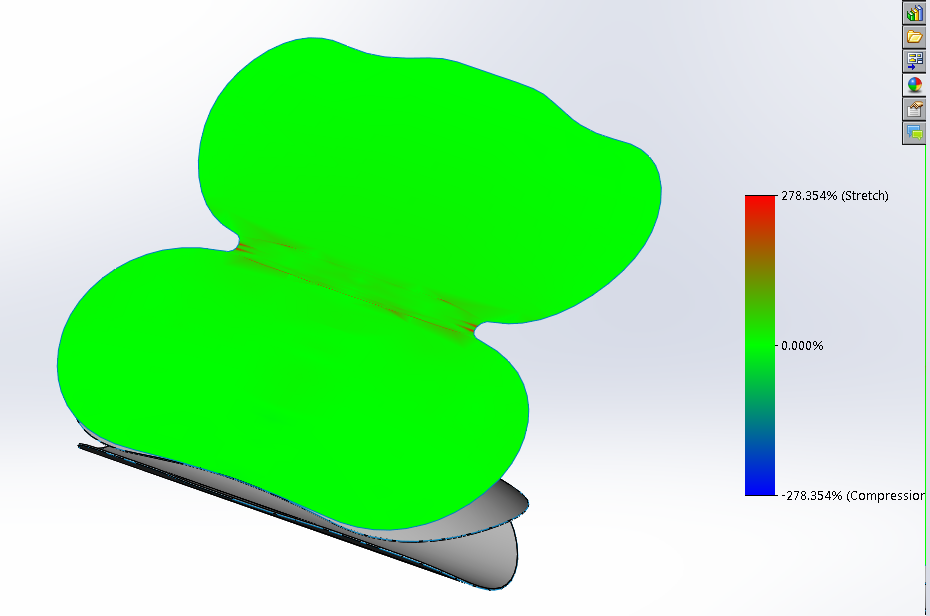 |
| The Deformation Plot |
In the CAD model I made I did not spend enough time to get the flexible hinge of the cover perfect, but we can see the stretch/tension in the area of interest.
Prepare the Cutting Profile
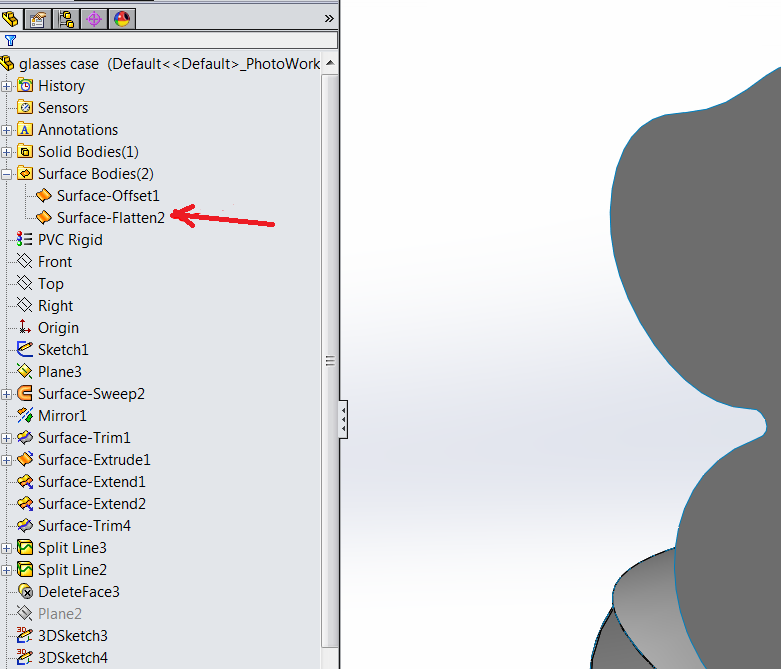 |
| Extra Surface Body in the Feature Tree |

Preview of Export to DWG
You get a clear preview of the shape and also have an option for orienting it prior to saving. This flattened shape can be sent off for nesting and cutting. We design processes don't stop there, but the feature has done it's job at this point.
What if I Don't Have SOLIDWORKS Premium?
As the title suggests, you need SOLIDWORKS 2015 Premium and later to enable use of the Flatten Surface feature - Some questions follow:
Q: Can the file be shared with another CAD user that does not have 'Premium? A: Yes. For those who aren't using SOLIDWORKS Premium, the file shared with others will still contain the feature and the fattened surface, but the feature can't be edited in SOLIDWORKS Professional or Standard versions. However, the surface created can be viewed and manipulated as in a regular SOLIDWORKS part: Put into a drawing, save out as a dwg and saved out as a separate body.
Q: Can the flatten feature have different amounts of stretch applied in different areas? A: At this time there is only mesh quality control.
The Final Piece - Determine if Fatigue is a Factor
We've covered several of the main points here - but I left one out. To use the tools that complete the full development cycle of a virtual lab environment, analysis on the glasses case for fatigue would be appropriate. We already saw from the previous posts that the glasses case was breaking and as I write this, the only thing holding the back and front together are the threads that have sewn them together - the formed material has now completely failed. But the sewing thread is still intact!!!
 |
| The case of the missing flexibility :-) |
I would love to see how the repetitive load on the cover - the motion from opening and closing the case - would result in failure and how long I should expect it to last.
I would like to have used Fatigue Analysis but I don't have the software or projects to justify the outlay. If you have the software and would like to publish results or share with me, you've got the model here. The material might be PVC, but I can't be sure. However, it would be an interesting exercise...
Further Information

Showing Flatten surface with holes in SW 2016 - M.Lord's photo from SOLIDWORKS World 2015
Normally what they show at SWW is only a hint of the enhancements that you get to see when the software is officially released. I'm looking forward to new tools and the ways I can use them.
That's all for now. Catch you next time!
That's all for now. Catch you next time!
No comments:
Post a Comment
Feel free to comment - you're ideas help me improve and design new content